


Exterior villa rendering is one of the activities performed in building exterior design. It is done using software such as Lumion, 3D Max, Revit, etc. In this project, I used Lumion Pro 12 software, which can produce beautiful and high-quality features in renders. In this article, we want to describe how to take an exterior rendering of a villa using Lumion Pro 12 software.
For this project, I used a pre-made model that had been previously modeled by a famous artist, but I made some changes to it.
Step 1 Modeling:
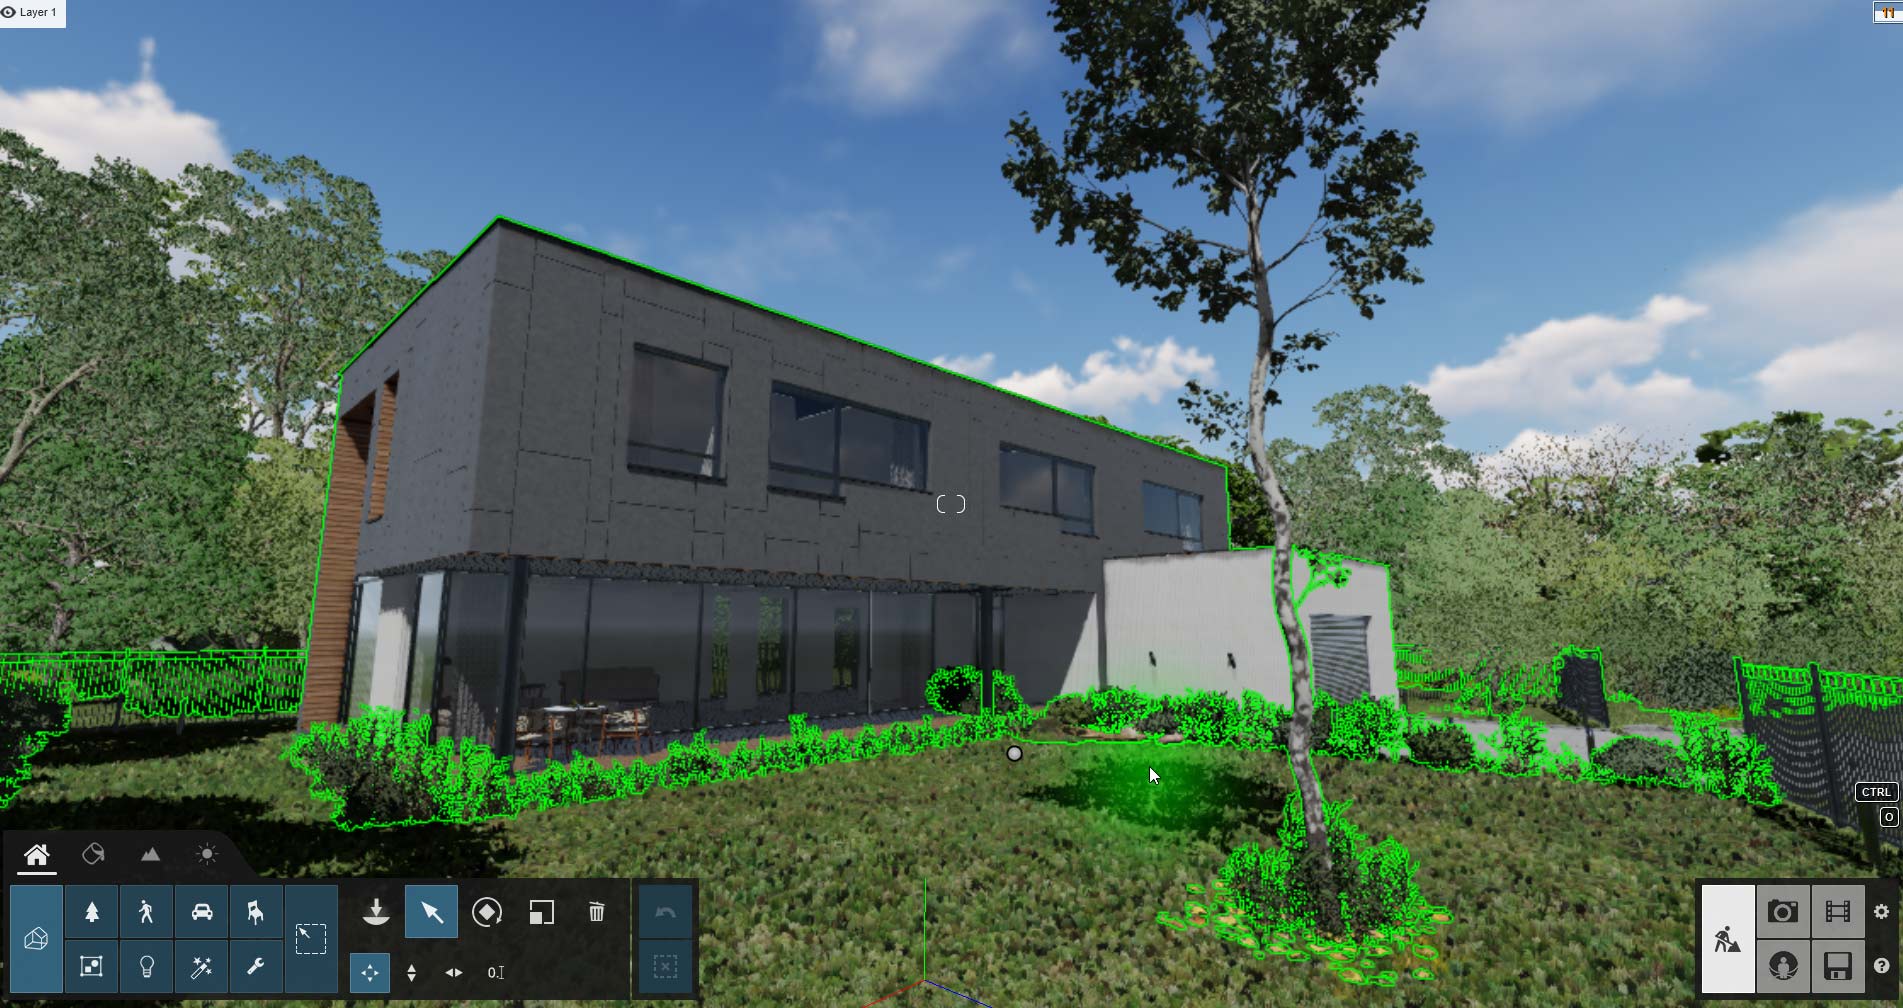
Modeling and Importing the Model Importing a 3D model from 3D Max to Lumion is one of the methods used to utilize 3D models in Lumion. By using the available plugins in 3D Max, the model can be exported as an FBX or OBJ file and then imported into Lumion. This method, however, has some issues and drawbacks since it does not directly connect with Lumion, which may lead to the loss of some features or flaws in the model. This includes losing textures, not importing lights and cameras, and even creating imperfections in the original model file.
However, with the recent introduction of the Lime Export plugin to this industry, it has greatly helped artists in this field. Using the Lime Export plugin can minimize these problems. The plugin allows the user to directly export their 3D model from 3ds Max to Lumion and quickly synchronize it with the Lumion environment. Additionally, this plugin allows the user to apply special features such as materials, textures, lighting, and more to their models. With this plugin, users can easily and quickly transfer their models from 3ds Max to Lumion and work with them. The LIME Export plugin is available for free for 3ds Max software and can help you transfer 3D models from 3ds Max to Lumion. With this plugin, you can transfer your created model with all its materials and textures to Lumion. This plugin has the ability to fine-tune input and output settings.
Although this plugin helps you transfer your models to Lumion, some issues may still exist with this method. For example, some materials and textures of your model may appear invisible in Lumion, or the quality of the model in Lumion may not be smooth, which is completely normal to check. Overall, using the LIME Export plugin can make the process of transferring 3D models from 3ds Max to Lumion easier, but you still need to make sure that all materials and textures of your model are properly placed in Lumion and that the final image quality is high enough.
Therefore, it may be better to manually add your model’s materials and textures in Lumion. This may be time-consuming, but the final image quality will certainly be much better.
Step Two Texturing:
Texturing: Creating realistic and unique textures in Lumion is one of the most important challenges in creating a realistic render. To create a realistic texture in Lumion, first you need to carefully select the material and model all the details. Then you need to use various techniques to create the texture, including texture-making plugins, masks, reflection textures, and bump mapping. You can also use high-quality image files with various formats to create the texture. By combining these techniques correctly, you can create a realistic and unique texture for your material and as a result, create a realistic render of your environment.
To create the realistic textures used in this project, you first need to find the image source. You can use real photos or websites that offer free texture images such as Textures.com and Poliigon.com. Then, using Lumion features such as image attachment and image processing, you can create realistic textures in Lumion. It’s also better to learn how to use different tools such as image processing windows and light animation before creating textures in Lumion. Additionally, to create realistic textures, you need to pay attention to small details such as lighting and brightness, real colors, and viewing angles. Finally, with different settings such as brushes, processing modes, and other parameters, you can create high-quality and realistic textures in Lumion.
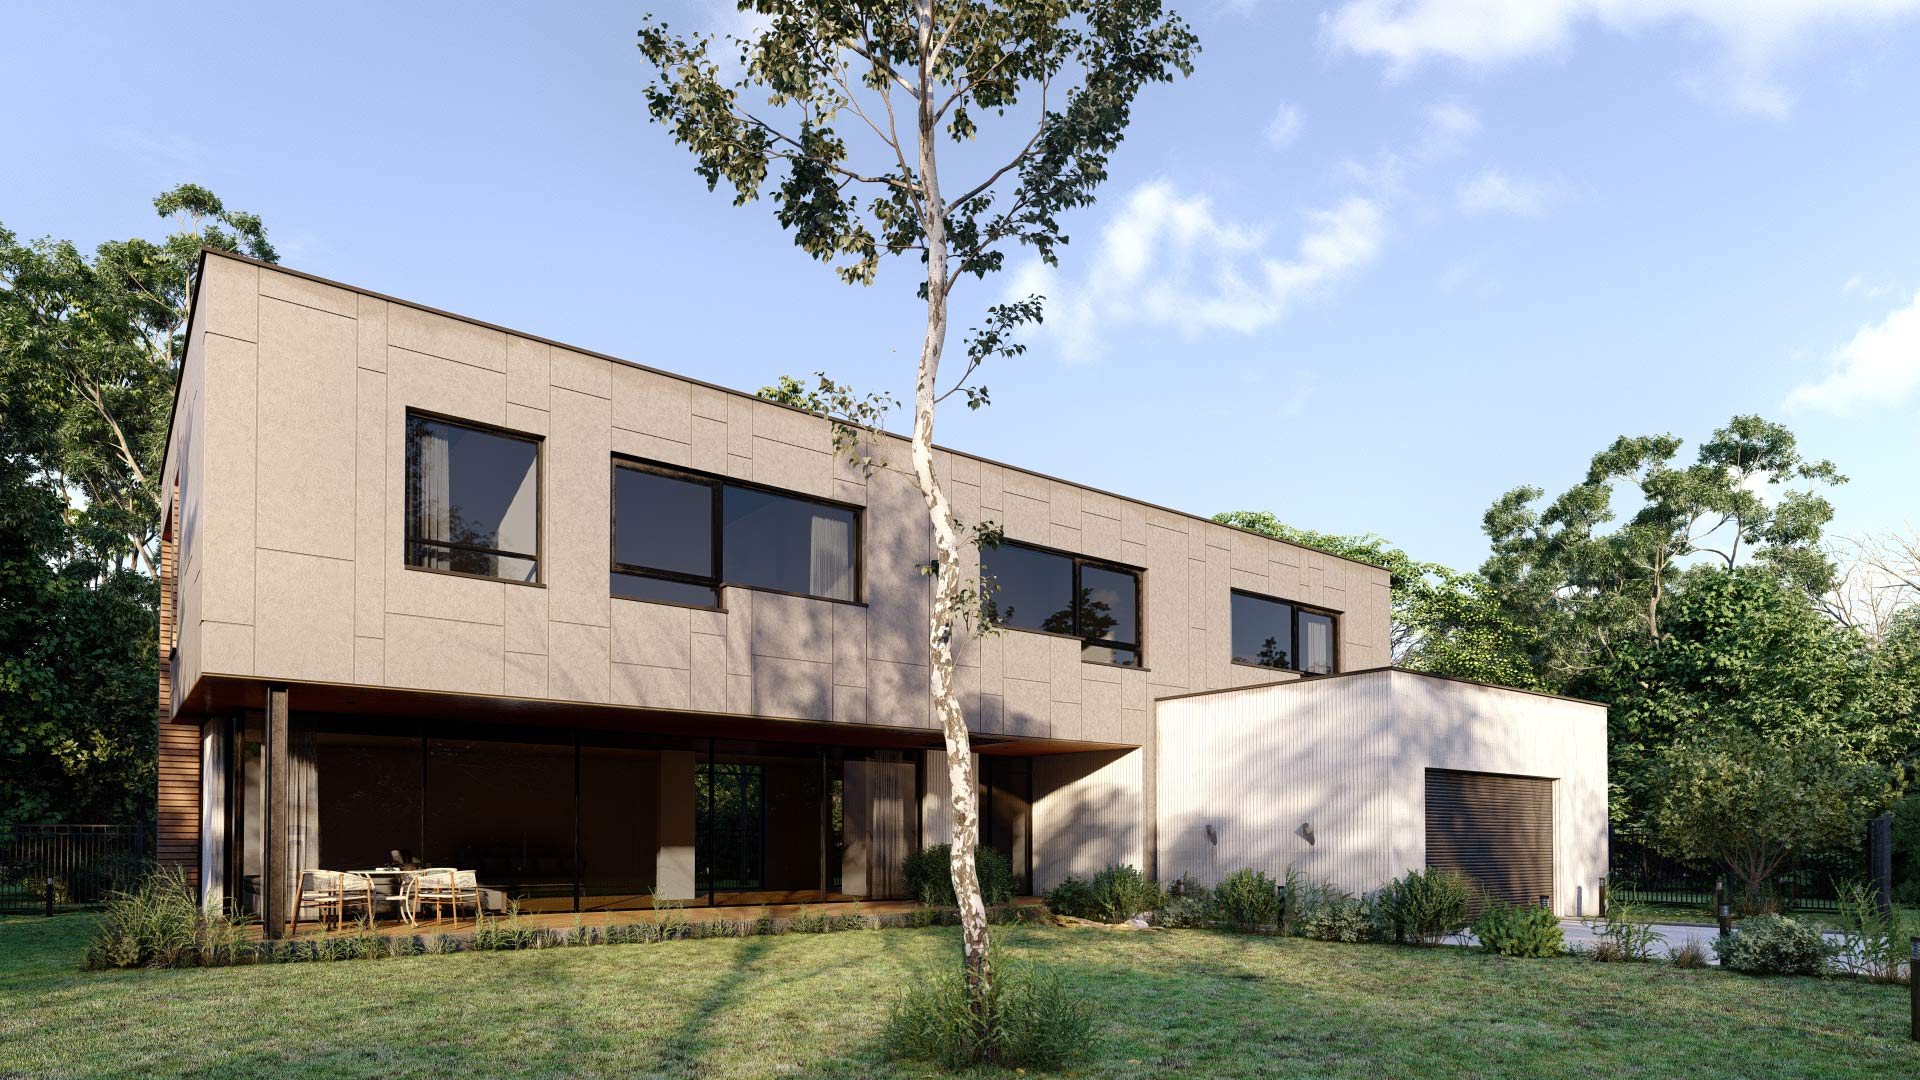
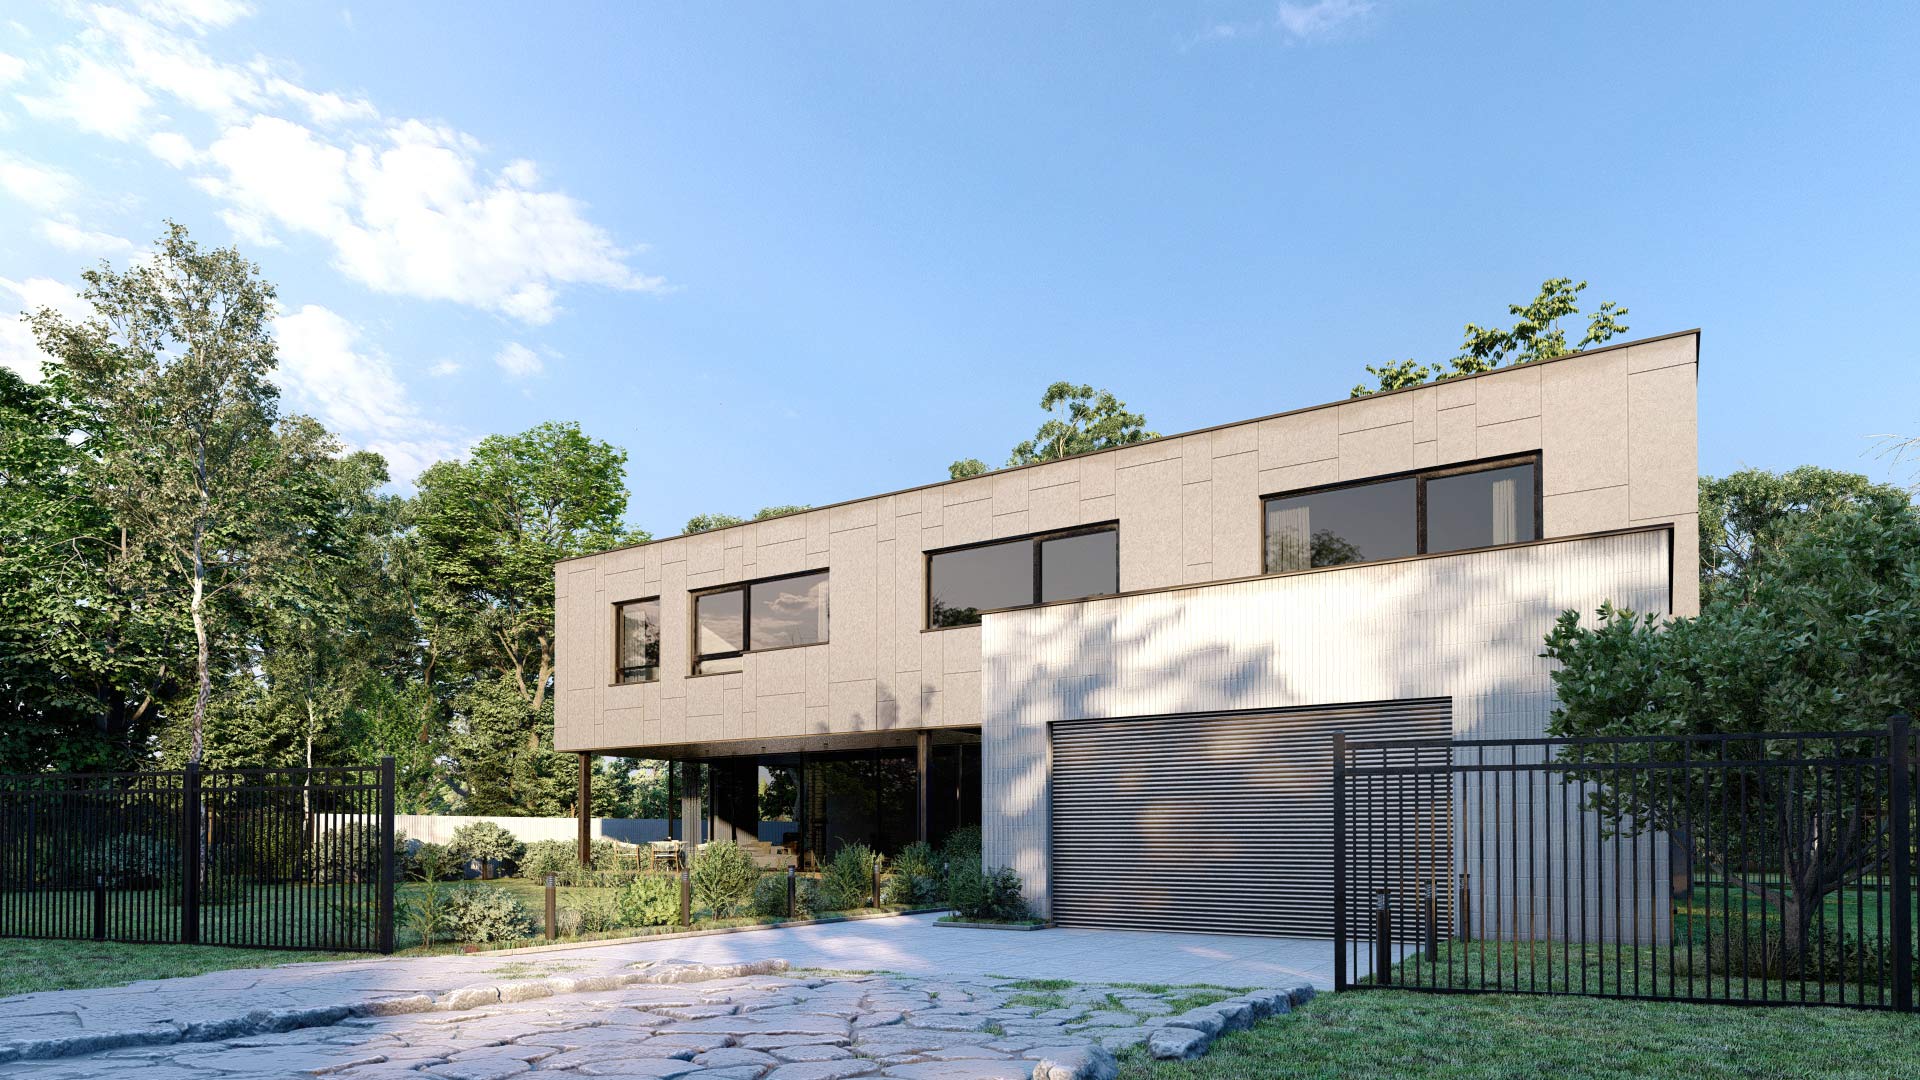
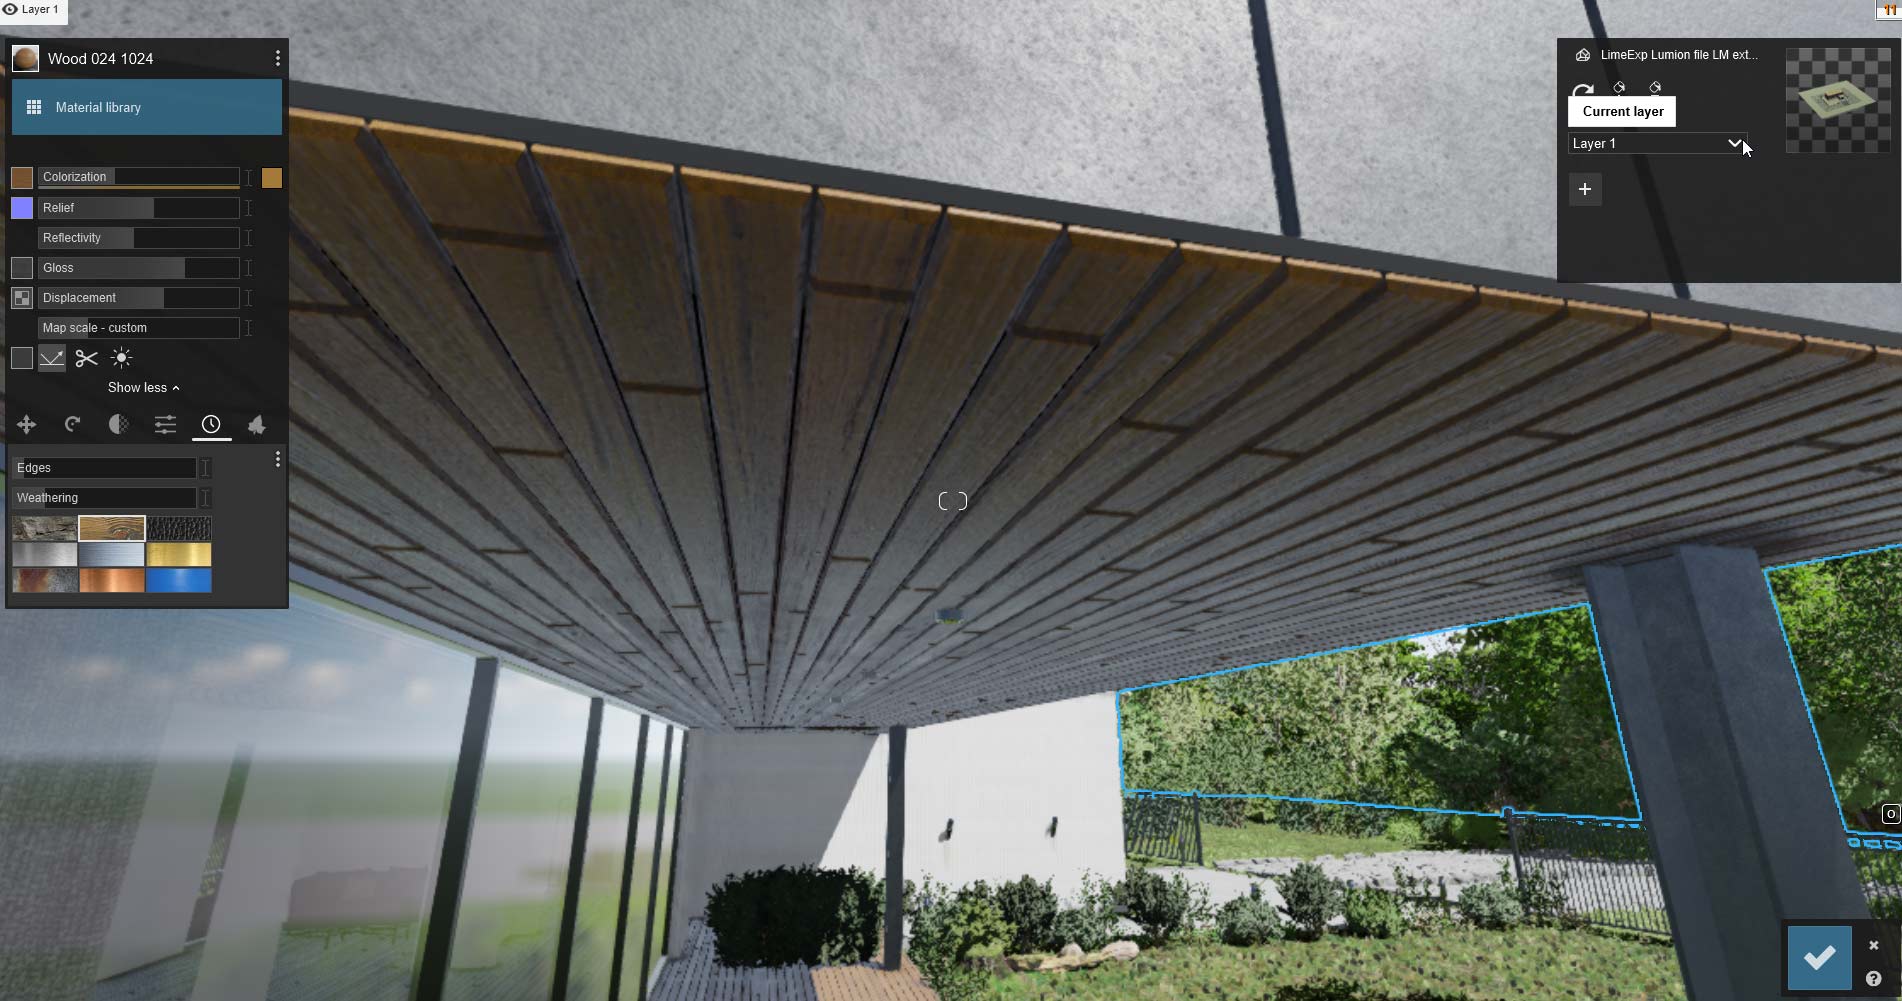
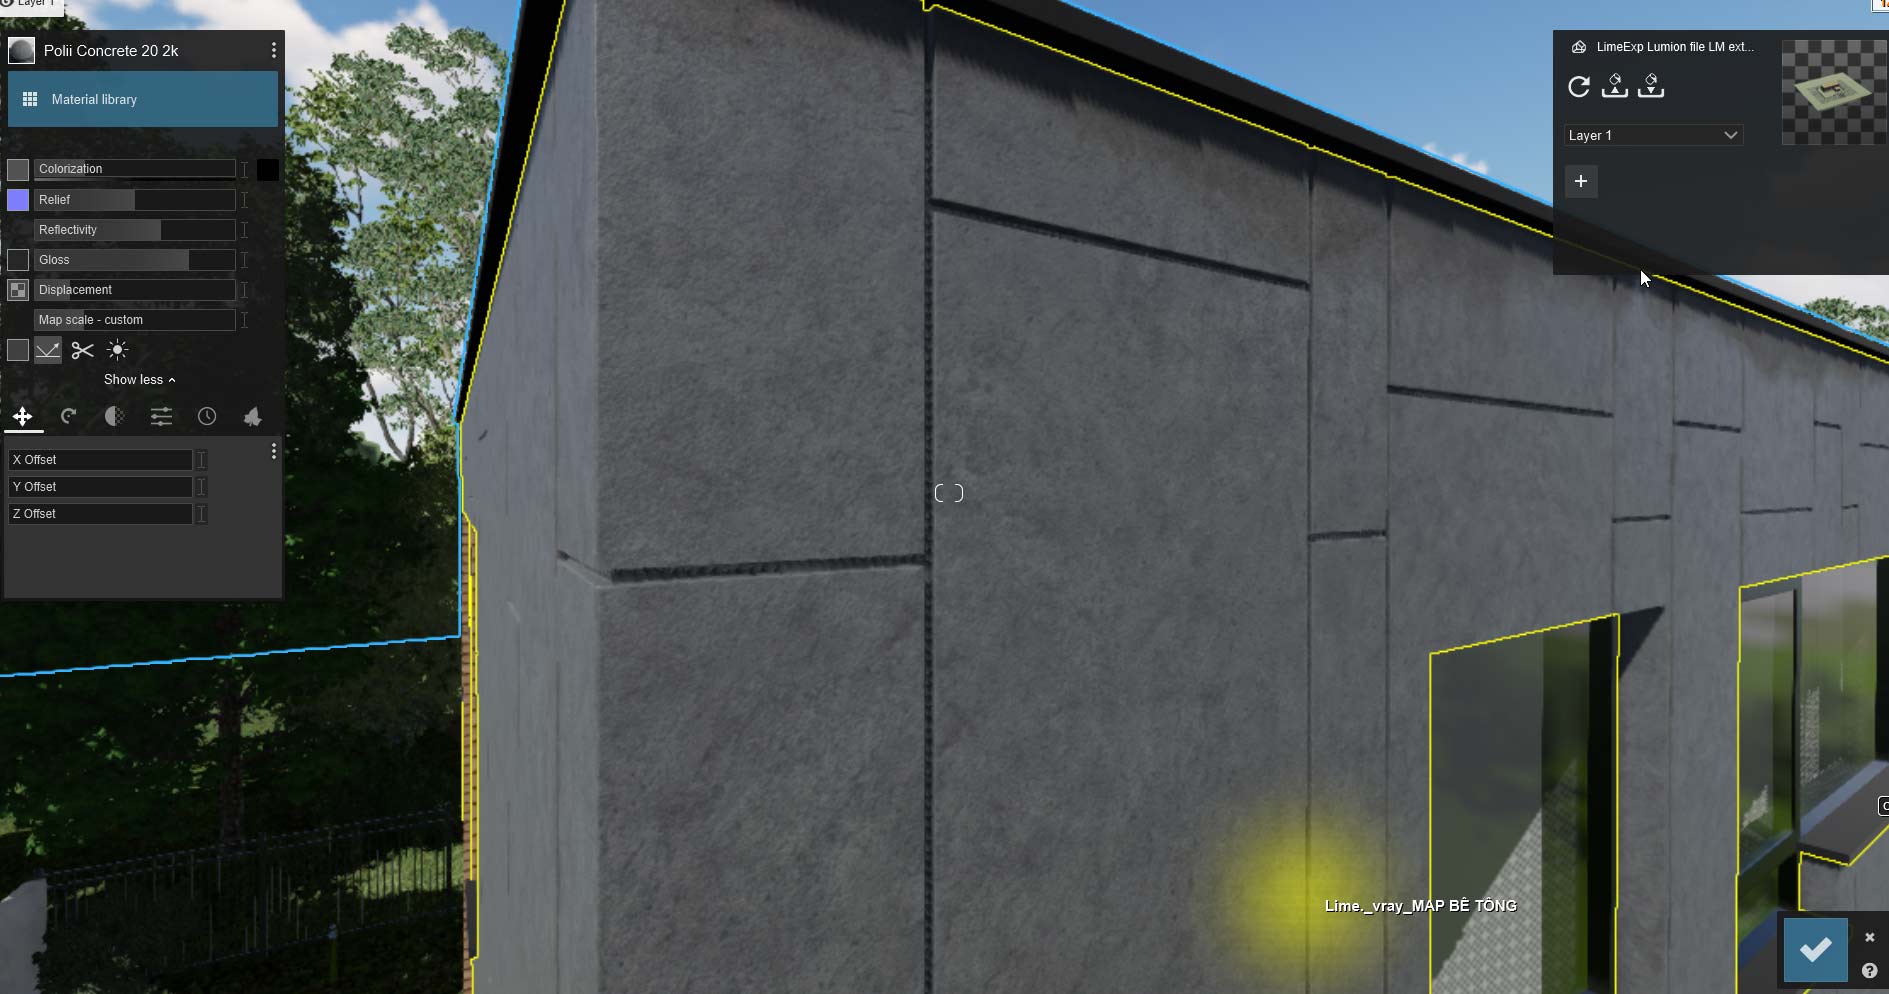
In this project, I focused more on the materials used in the render, especially the cement facade, concrete walls of the parking lot, glass, and grass. For the cement facade, the appearance of real cement was replicated by selecting a real texture and color. The texture was added to the model using the Lumion internal material library, and the color was adjusted using the Lumion color editor to match the desired gray shade. Similarly, the concrete walls of the parking lot were created using a similar process to that used for the cement facade, and a concrete texture from the Lumion material library was selected and applied to the model. To create realistic glass materials, the Lumion internal glass materials were used. The glass was adjusted to be slightly reflective and allow the surrounding forest environment to be reflected. The thickness of the glass was also adjusted to create a more realistic appearance.
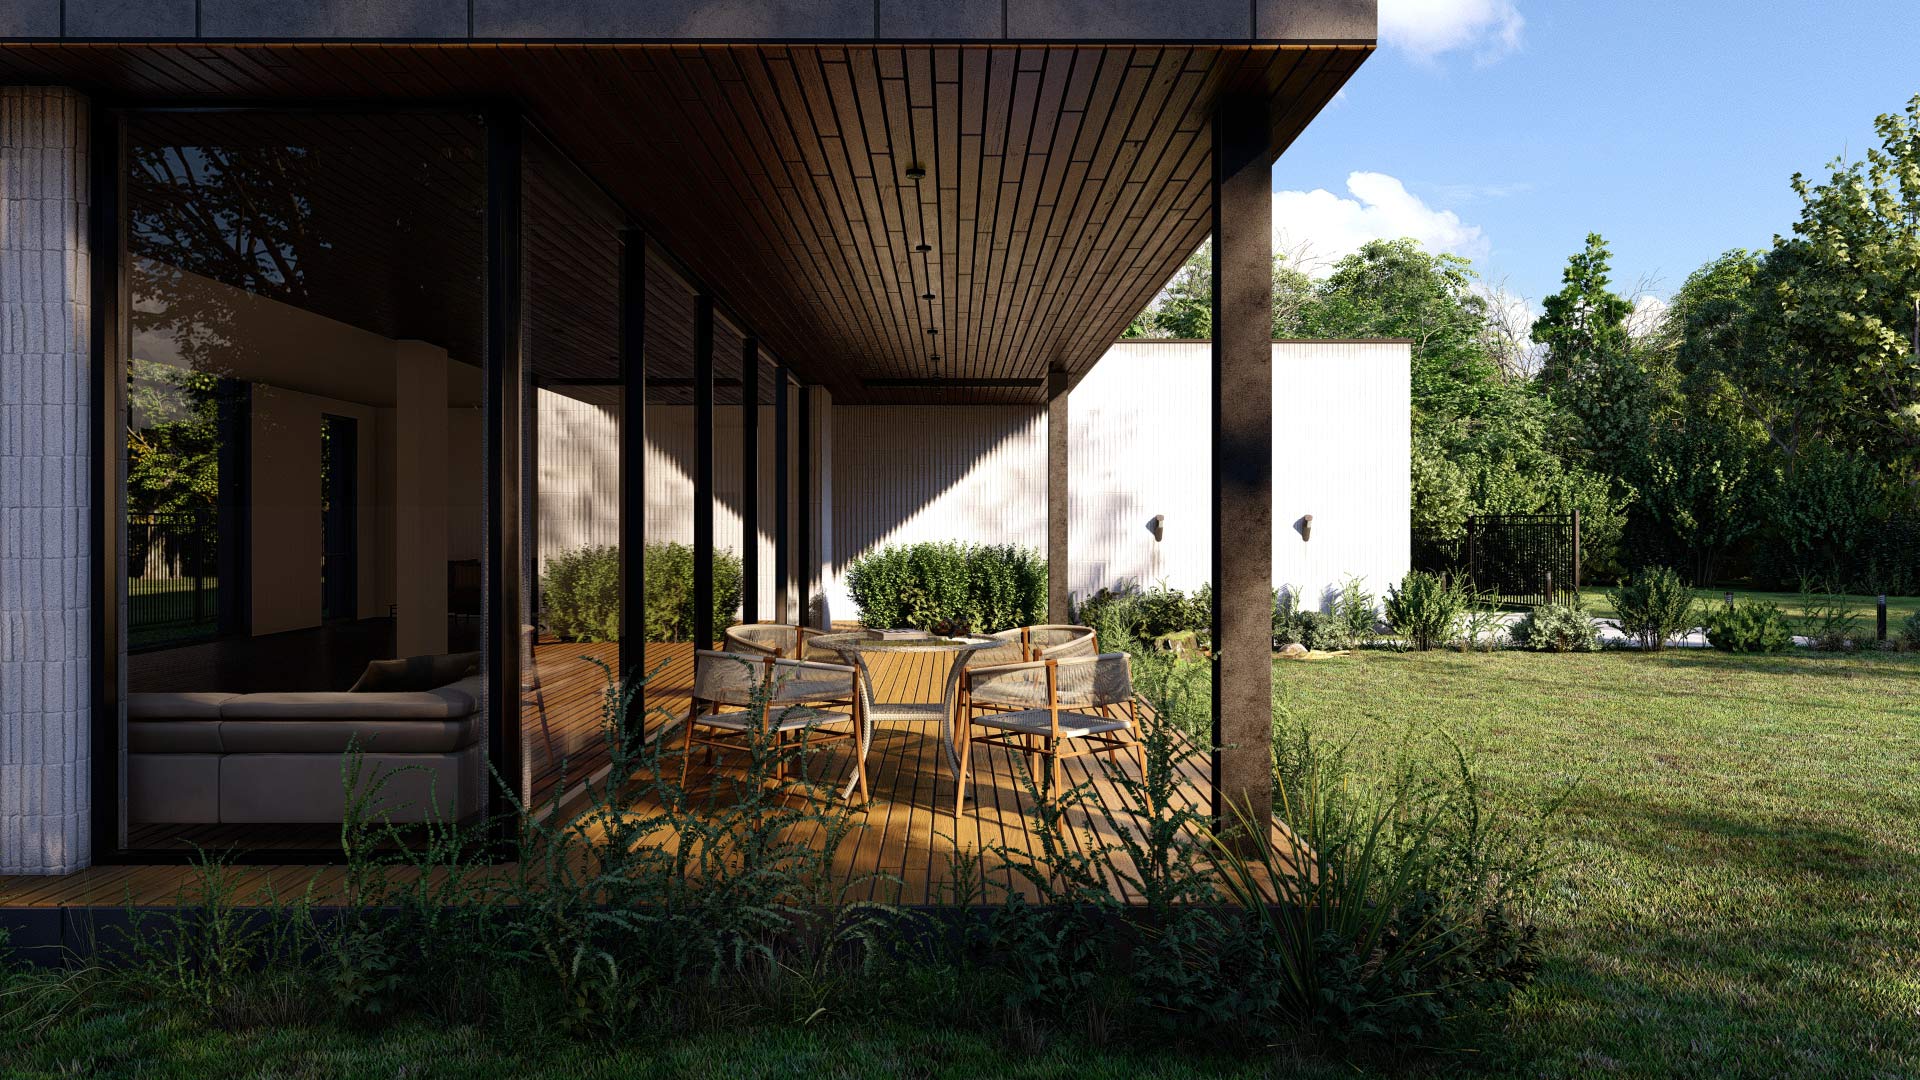
The grass material was created by combining the Lumion internal materials with custom textures created by me. A real grass texture was used as the base layer, and custom textures were added on top of the base layer to add variety and depth to the grass. These custom textures included variations in color, height, and density, and were carefully placed to create a natural and organic appearance.
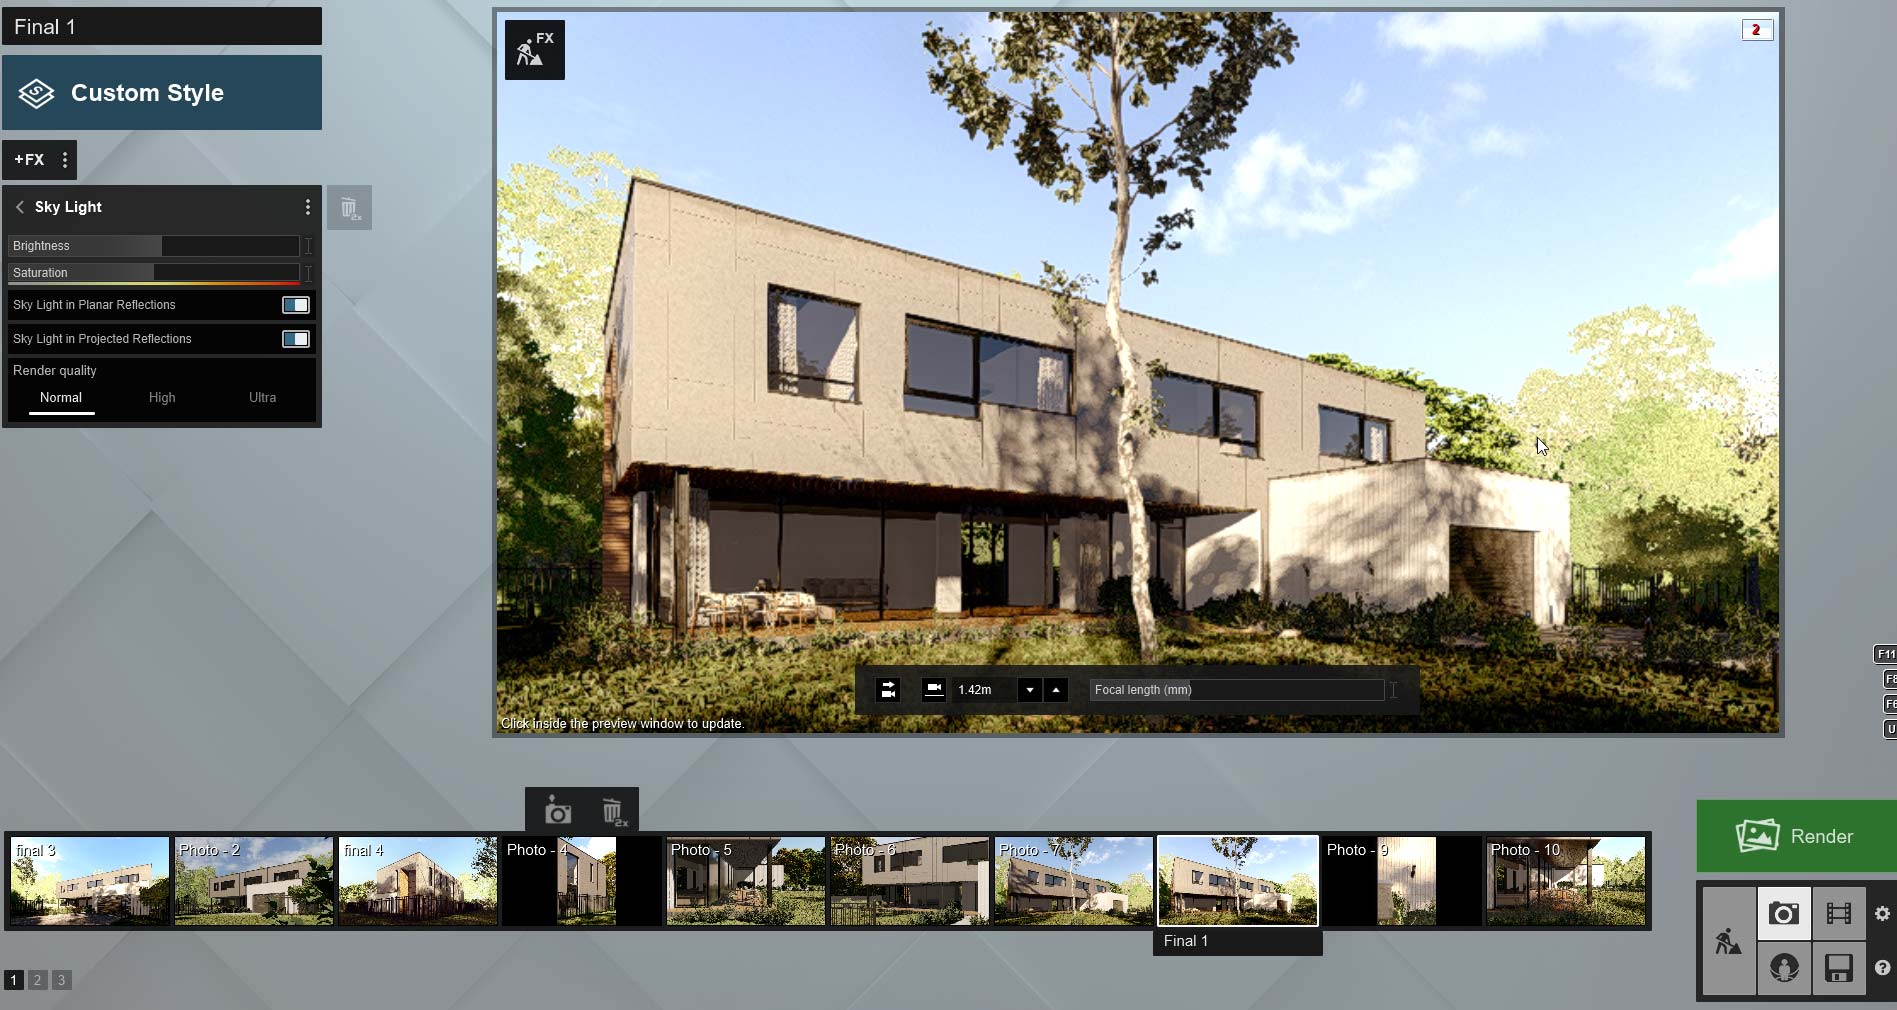
Step Three Lighting: As lighting can have a significant impact on the attractiveness of spaces, the use of advanced lighting environments such as villa lighting in a project requires attention to various factors. Initially, appropriate light sources must be selected to make the best choice based on the type of space and the amount of light required. Then, the appropriate position and angle for each light source must be considered to create balance in the lighting. Additionally, settings such as light intensity, color, and color temperature must be carefully adjusted to achieve the best result in lighting.
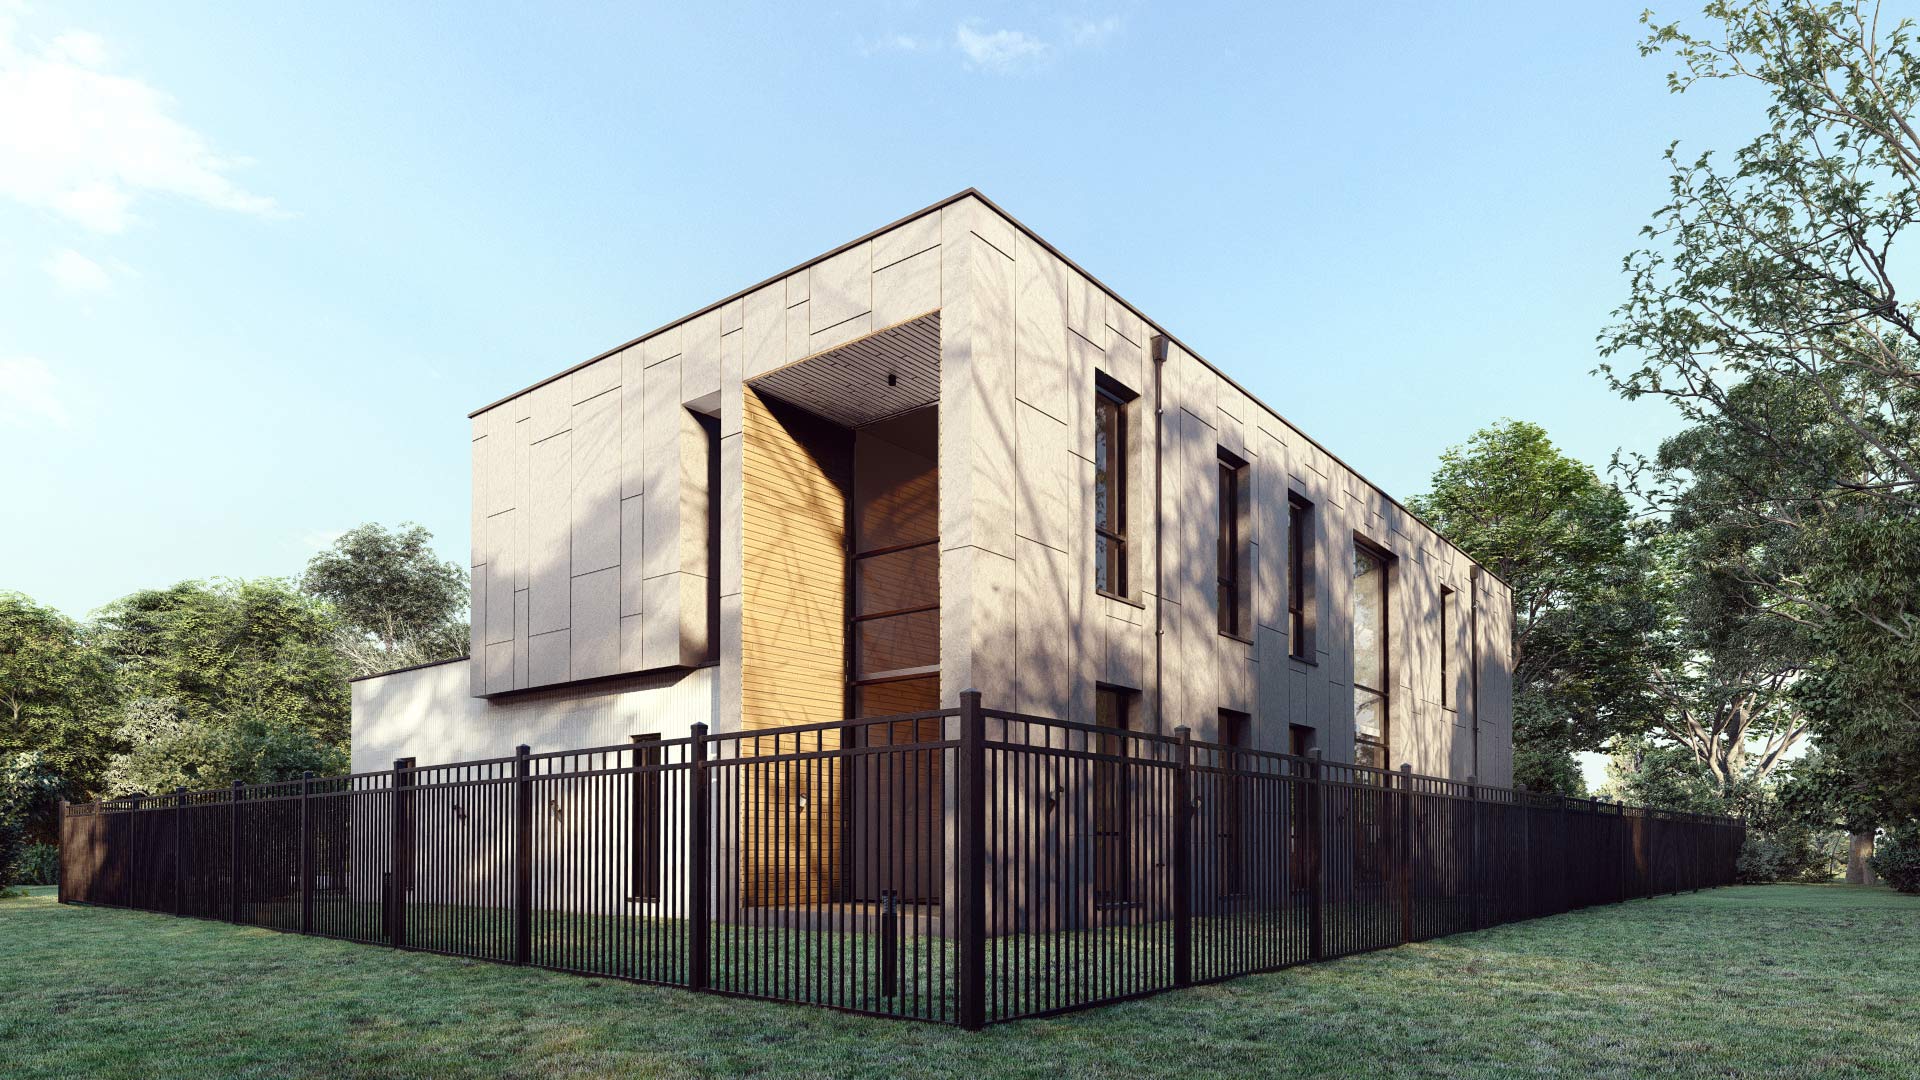
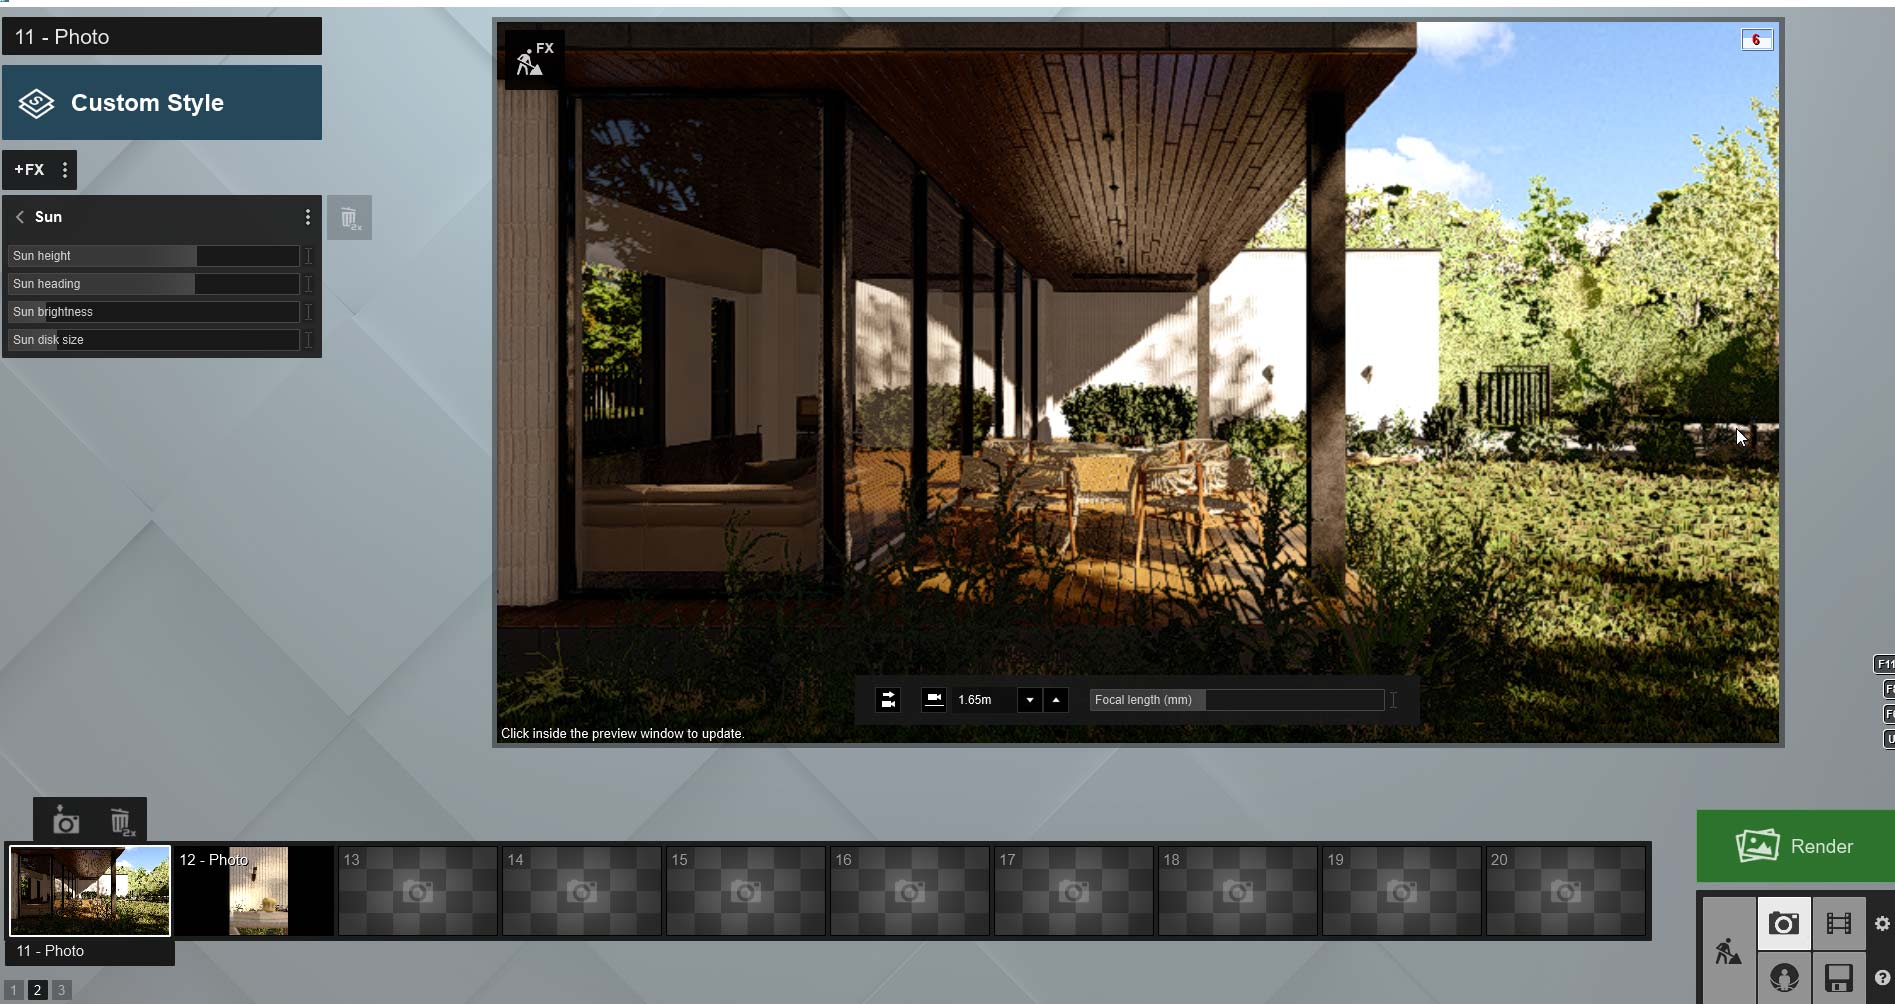
In the lighting design of the villa project, various advanced tools have been used as lighting can have a significant impact on the attractiveness and beauty of indoor and outdoor spaces. In this project, the intensity of sunlight has been used precisely to reflect the environment well. Also, the angle of the sunlight has been accurately adjusted to achieve the best possible result. In addition, the positions of light sources have also been carefully adjusted to achieve the best lighting result. For the best color balance, the color and temperature of sunlight have been used. The position of shadows has also been precisely adjusted in the rendering settings to achieve the best result. Additionally, the sky has been added to the image, and its intensity has also been accurately adjusted to achieve the best possible result in lighting. Different shadows are also created in the villa scene due to the types of light sources and their positions. In this project, by precisely adjusting the camera angle and the position of light sources, the lighting has been drawn in the best possible way.
We should pay attention to the levelness and proper distribution of light in the space to achieve a desirable effect on the scene. Keep in mind that in order to create special effects, we may need to use techniques such as professional lighting and light filters. Finally, the timing of the lighting should also be adjusted carefully to achieve the best result. In general, lighting in a villa project is one of the important factors in creating a sense of space, and if done carefully and professionally, it will have the best result.
Stage 4 Render Settings:
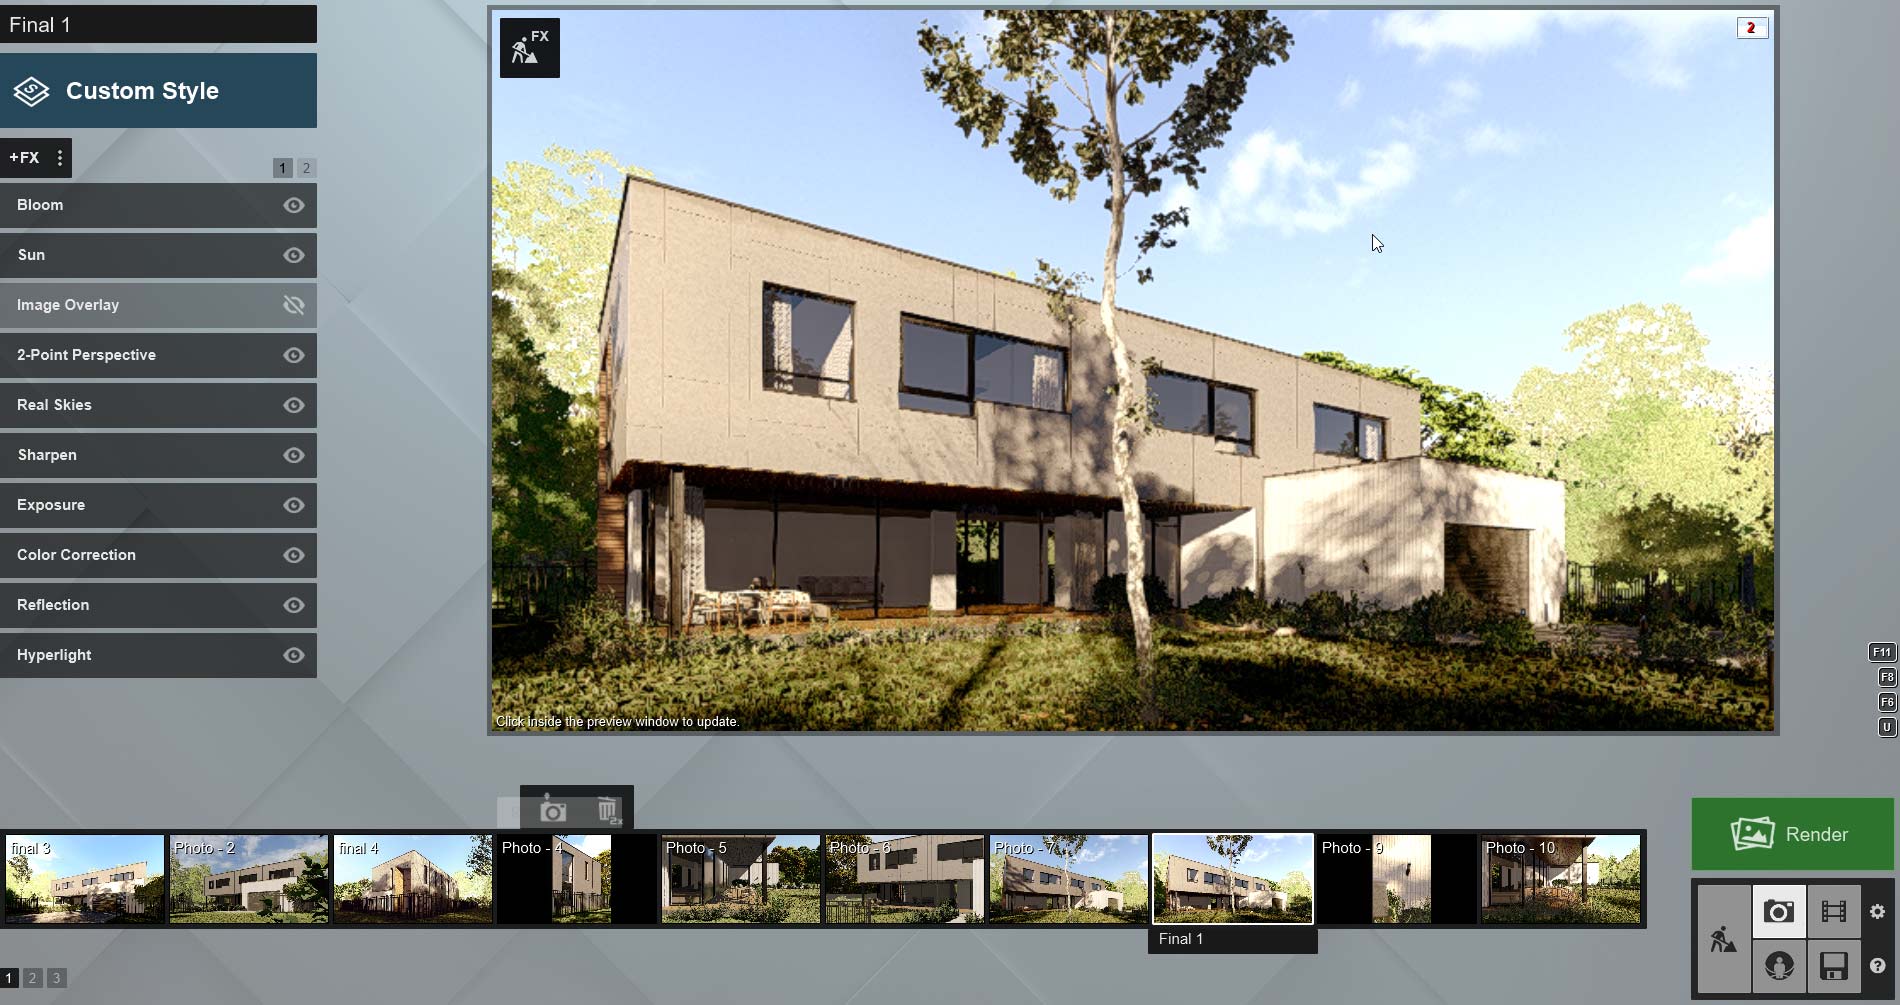
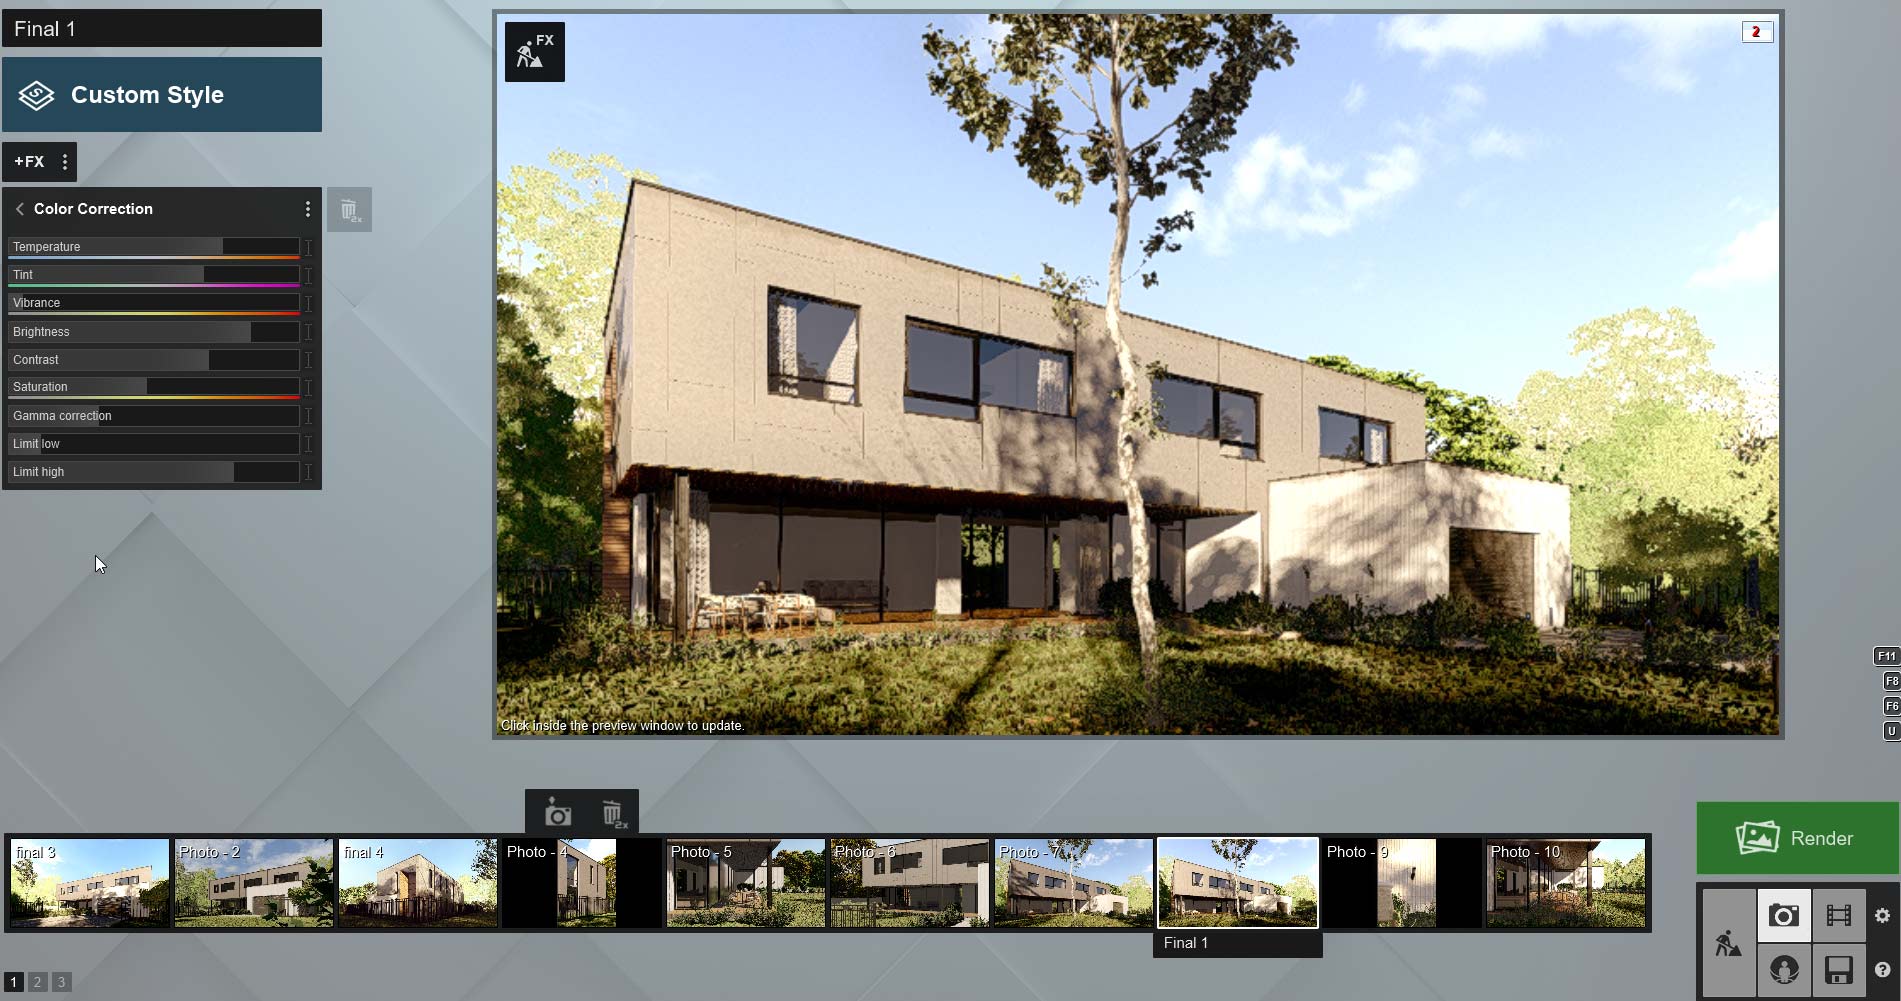
In this stage, we focus on render settings in Lumion, including selecting the render type, quality control settings, volume, output format, and more. To get high-quality external renders, you can use the effects that I used in this project and easily apply them to improve your render.
⦁ DOF: This effect allows you to make points far from the focus point unclear. In fact, you can use this effect to emphasize a specific object or increase image depth.
⦁ Fog: By creating fog in the scene, this effect allows you to give a greater sense of depth to the image and make points out of view not visible. Increasing the amount of fog can make your image look particularly dreamy.
⦁ Bloom: This effect increases the intensity of light and light output from a specific area range, giving the image a sense of brightness and clarity.
⦁ Sun: With this effect, you can change the direction and arc of the sun’s rays and simulate time. This effect allows you to add joy and vitality to the scene by changing the intensity of light.
⦁ Image Overlay: This effect allows you to place an image over the scene and display it in a composite form with the scene. Examples of this type of image could be a barbecue or traffic on a road.
⦁ 2-Point Perspective: By increasing the influence of the second point, this effect allows you to transform the image from a 3D view to a 2D view.
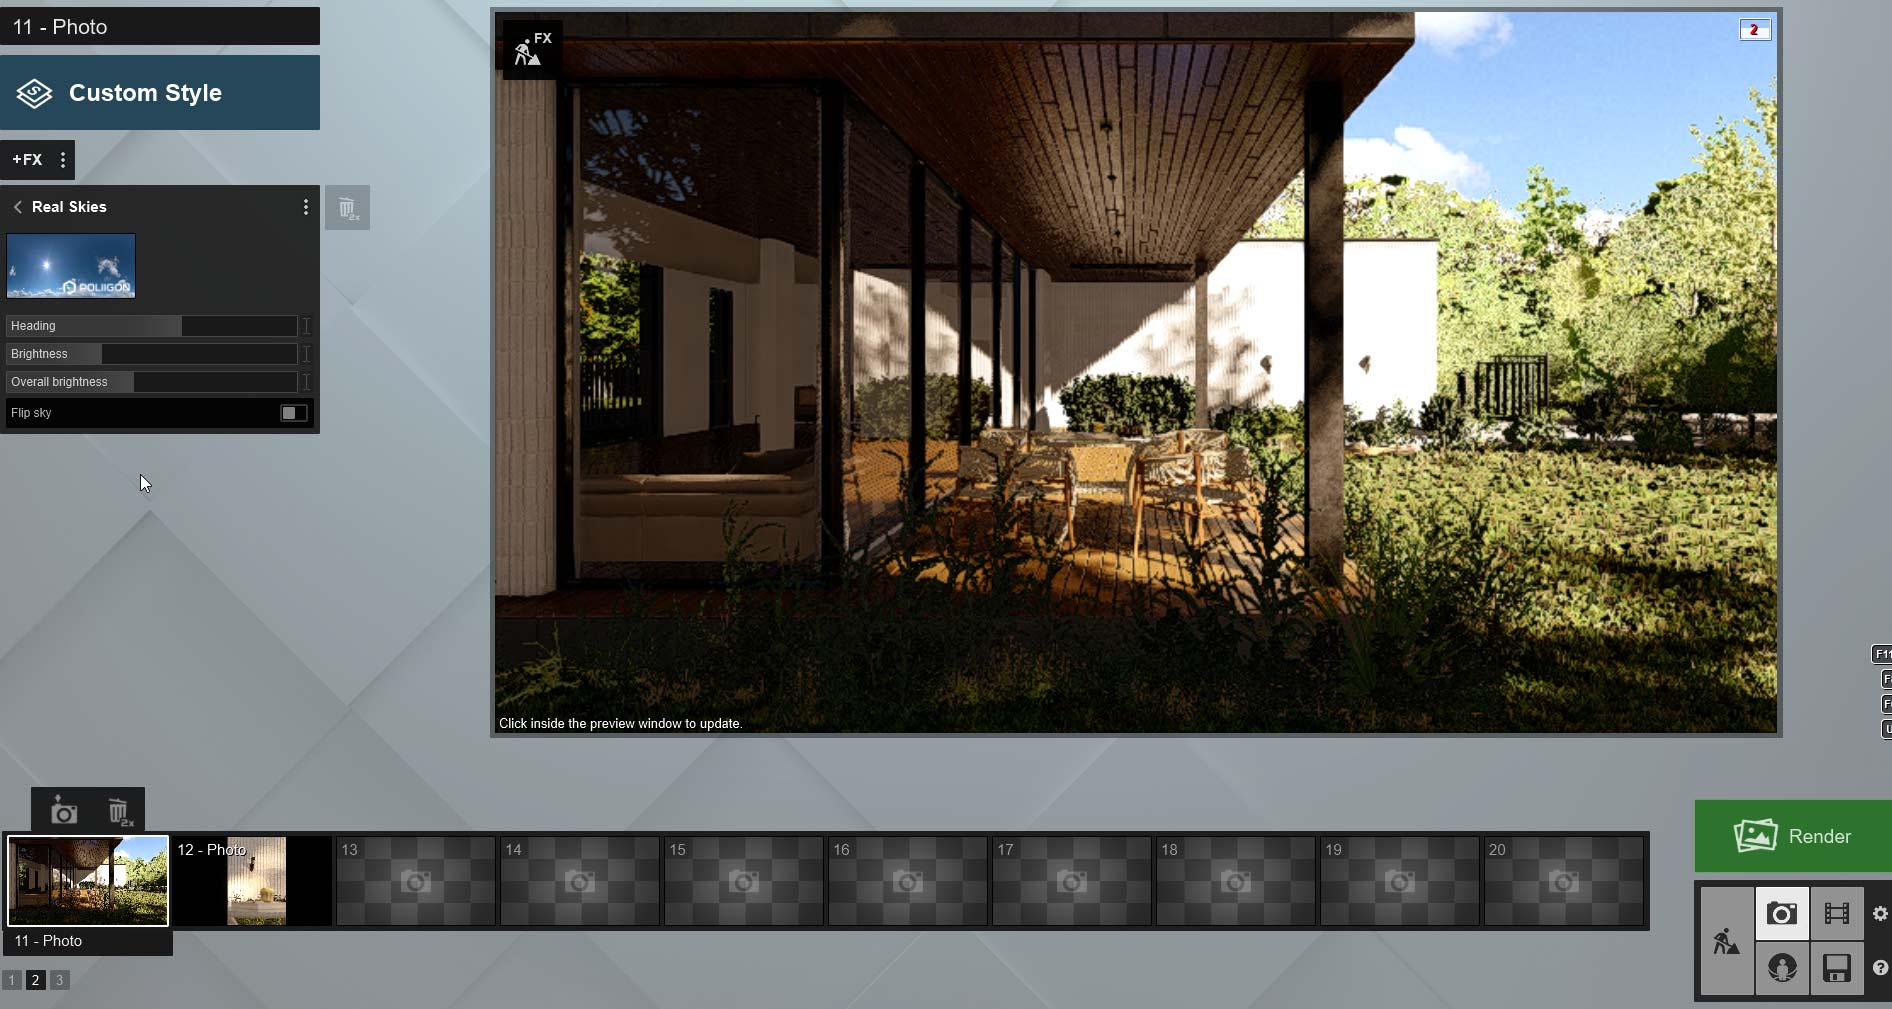
⦁ Real Sky: Real Sky is an effect that uses real sky images to help visualize a more realistic scene. This effect can use high-quality images of the sky in different angles and weather conditions as the background in the scene.
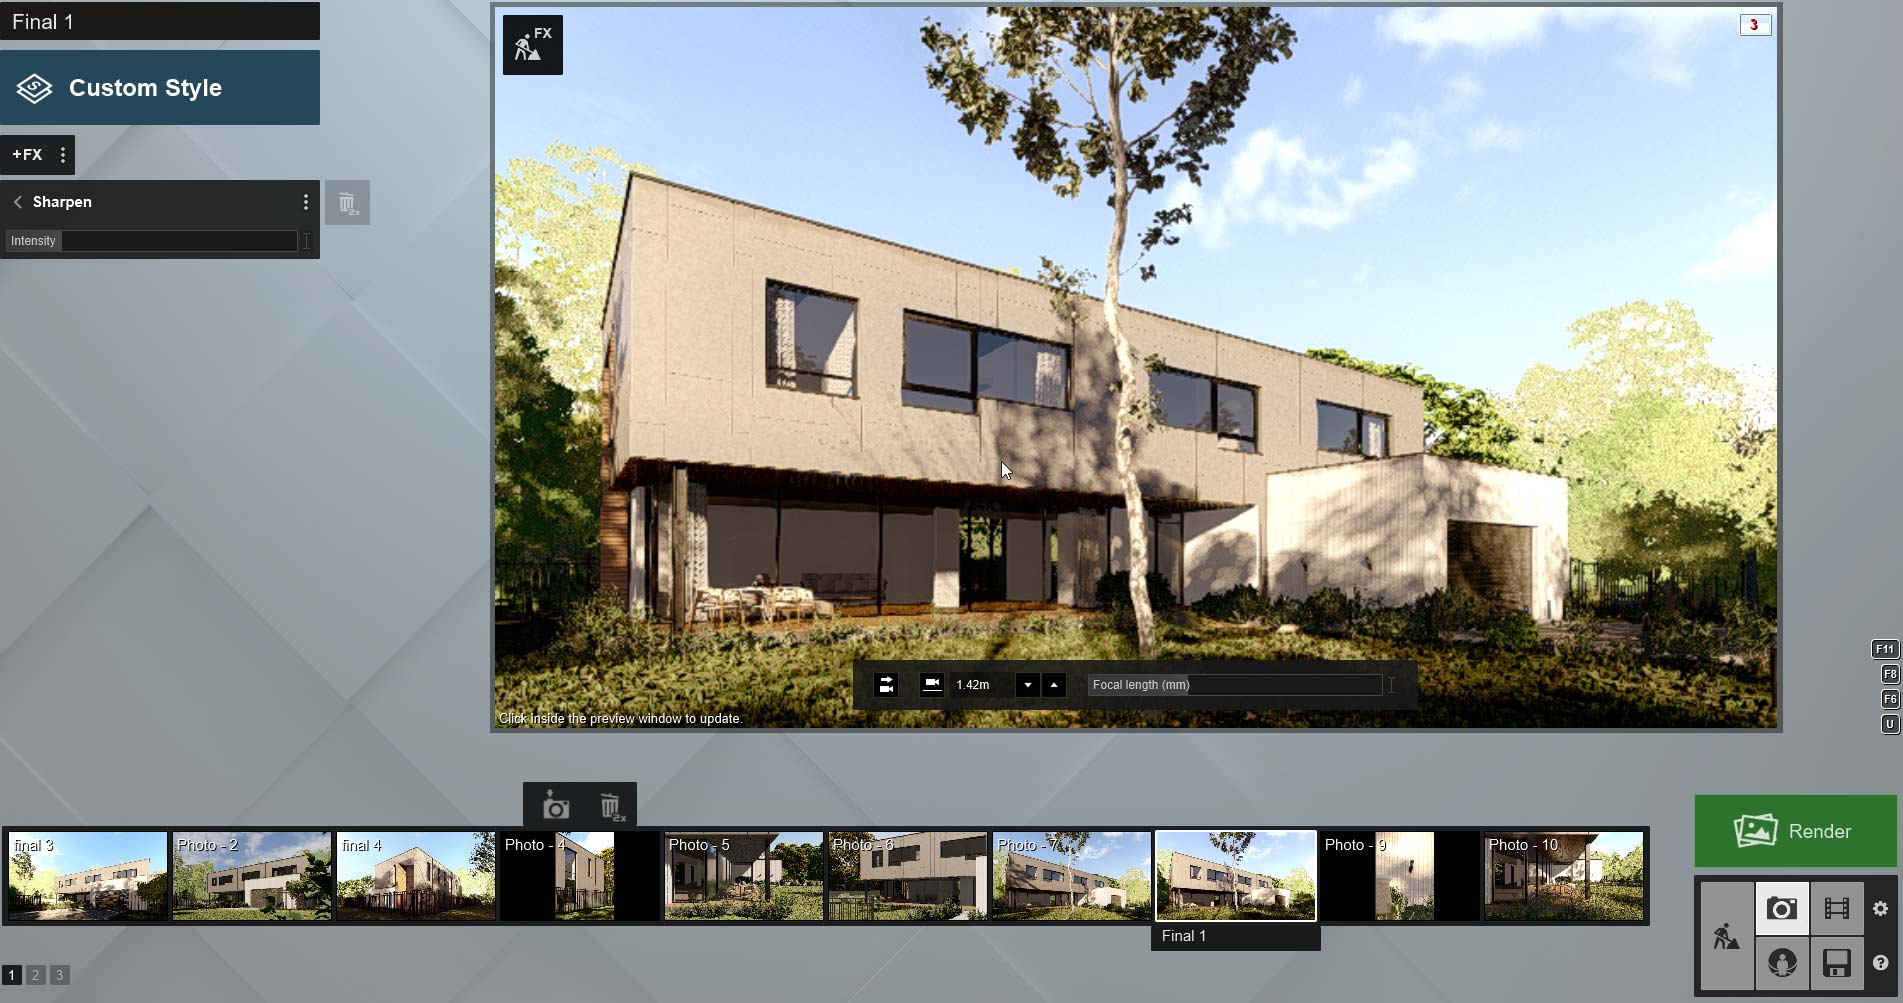
⦁ Sharpen: Sharpen is a filter that sharpens the image by increasing its brightness and contrast. This effect can restore images that are unclear or slightly dull and create images with more details.
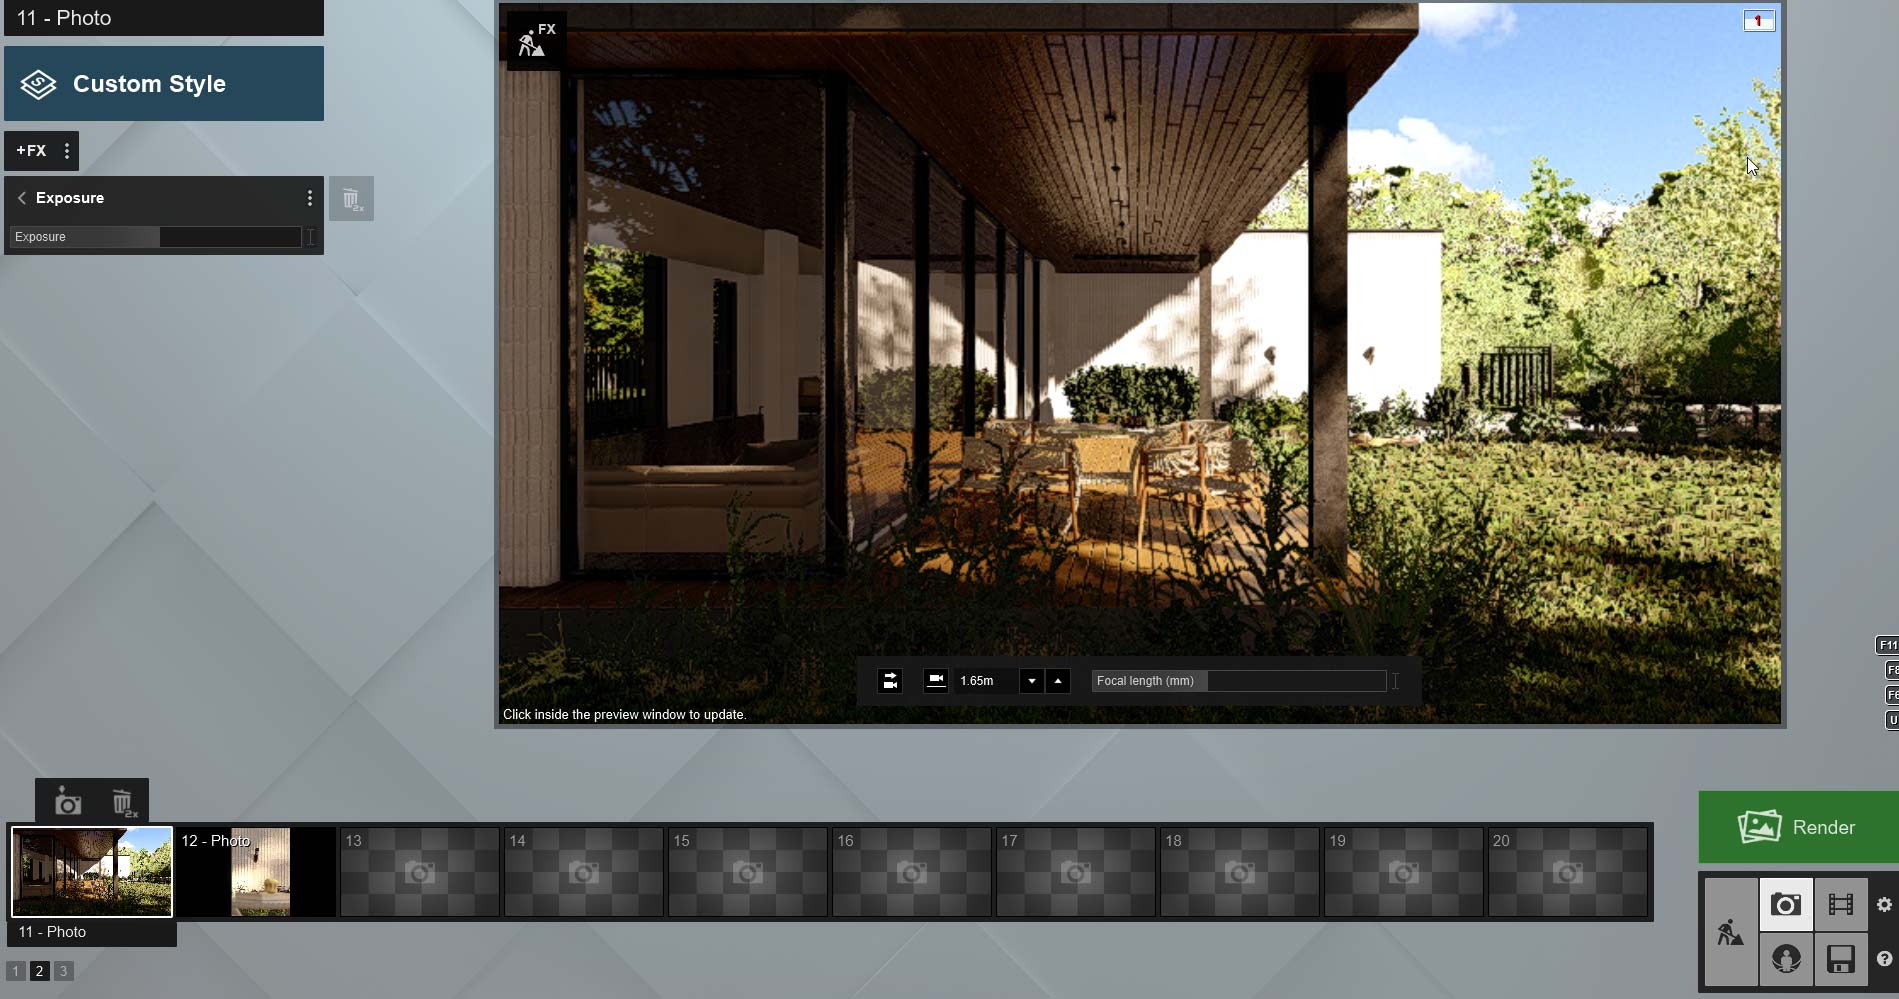
⦁ Exposure: Exposure is an effect that improves the image by adjusting the lighting and brightness. This effect can adjust images that are too dark or too bright, and create images with vibrant and attractive colors.
⦁ Color Correction: Color Correction is an effect that improves the image by changing its colors. With this effect, you can adjust the colors of the image to your desired accuracy, and create an image with attractive and vibrant colors.
⦁ Reflection: Reflection is an effect that applies a reflection of the scene onto another surface using a mirror image. This effect can create a more detailed and realistic image.
⦁ Hyper Light: Hyper Light is an effect that brightens the image by creating more intense and brighter light.
Using these effects and other effects can help you improve your images and create more attractive and realistic images for your audience. After making the necessary adjustments, we can proceed to the exterior rendering of the villa. This stage may be time-consuming and depending on the number of samples required to achieve the desired quality, it may take several hours.
After the exterior rendering is done, we can apply the final adjustments to the image using graphic software. These adjustments include image retouching, color changes, and other minor adjustments.
Finally, considering the quality of the external render and final adjustments, we obtain a beautiful and high-quality image of the villa, which can be showcased as an example of our work in the field of villa design using Lumion software.
None
3d Max, Lumion, Photoshop